8.5 KiB
title, description, published, date, tags, editor, dateCreated
| title | description | published | date | tags | editor | dateCreated |
|---|---|---|---|---|---|---|
| Preparation | true | 2025-04-18T23:08:42.017Z | markdown | 2021-11-15T15:39:49.074Z |
Prepare the host computer
Phyllome OS is in alpha stage of development. Expect bugs and disappointment {.is-warning}
Installing Phyllome OS involves booting from a bootable USB flash drive and fetching an online kickstart file, which contains instructions to automatically deploy Phyllome OS.
The kickstart installation method provides a way to configure and automate the installation of most RPM-based distributions, including the official Fedora distributions as well as Fedora Remixes like Phyllome OS {.is-info}
Prerequisites
- A USB flash drive
- Instructions available in the next section
- A wired Internet connection
- Files will be fetched online during the installation process
- Wireless connections are not supported
- A computer with a storage device, see requirements below
- A kickstart description of a Phyllome OS installation, available as an Internet-accessible file
- Phyllome OS is automatically deployed based on a kickstart file
The Phyllome OS computer host
Minimum requirements
- A x86-64 computer which supports hardware-assisted virtualization, which means:
- For AMD-based configurations: AMD V is available and enabled
- For Intel-based configurations: Intel VT-x is available and enabled
- A 2-core processor
- 4 GB of RAM
- 10 GB of hard disk storage space for Phyllome OS
- 250 GB of hard disk storage space to store guest OS disk images
Most computers sold after 2015 support hardware-assisted virtualization {.is-info}
Recommended requirements
- A x86-64 computer that supports the 2nd gen of hardware-assisted virtualization
- For AMD-based configurations: AMD Vi is available and enabled
- For Intel-based configurations: Intel VT-d is available and enabled
- A 4-core processor
- 16 GB of RAM
- 10 GB of SSD or NVMe storage space for Phyllome OS
- 1 TB of SSD or NVMe storage space to store guest OS disk images
- Two graphics cards or a graphics card that supports vfio-mdev or SR-IOV
Enabling hardware-assisted virtualization
Hardware-assisted virtualization is rarely turned on by default, even on computers that support it: this section explains how to enable it.
Failure to enable hardware-assisted virtualization will make running virtual machines extremly slow, if possible at all. If it cannot be enabled, you would be better off picking a Linux distribution which doesn't require it, such as Debian or Fedora {.is-warning}
Accessing the platform firmware interface on Windows
Enabling hardware-assisted virtualization requires accessing the firmware configuration tool of your motherboard, better known as the BIOS or UEFI. This process differs depending on which operating system is currently installed on the computer you intend to install Phyllome OS on.
Command-line instructions for Windows 8 and newer
Press the Win and X keys simultaneously to make a context menu appear. Press Shift and a to open PowerShell using elevated privileges and click on the Yes button to bypass the User Account Control pop-up. Finally, input the following command inside the command prompt and press Enter.
shutdown /fw /r
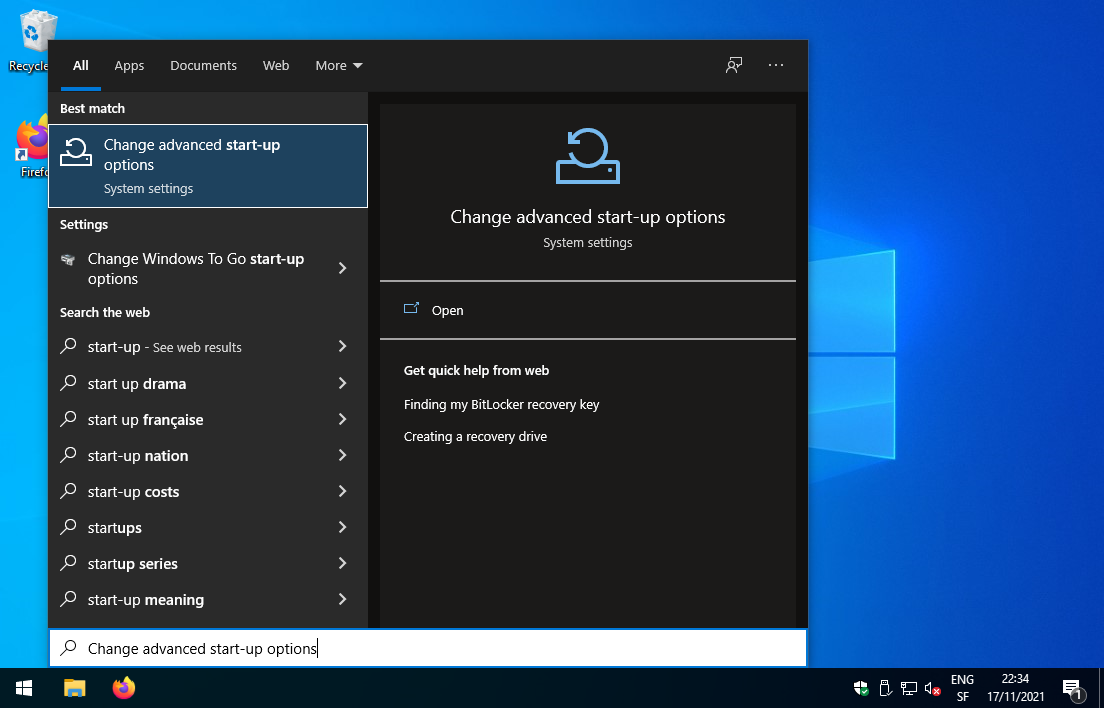
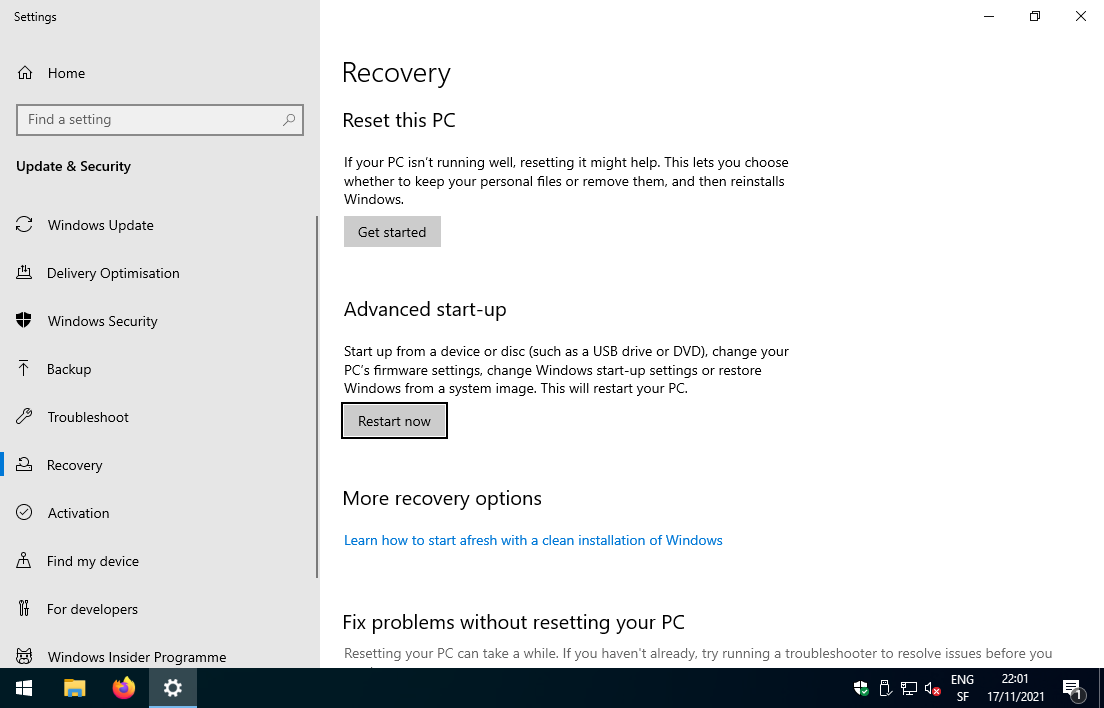
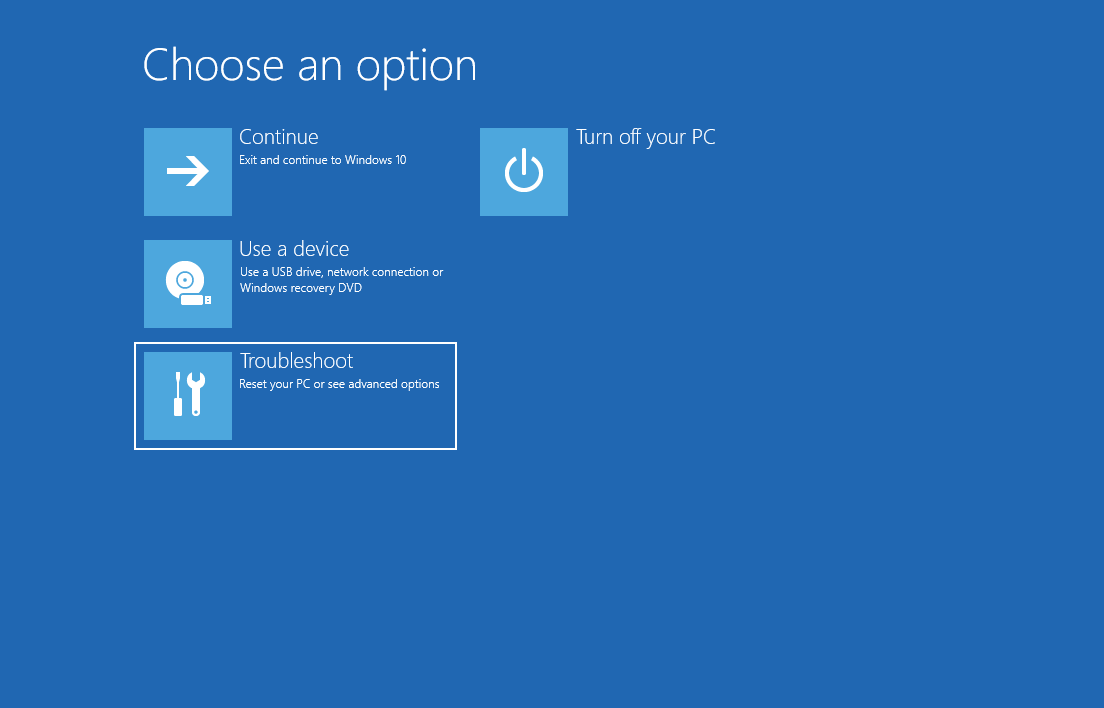
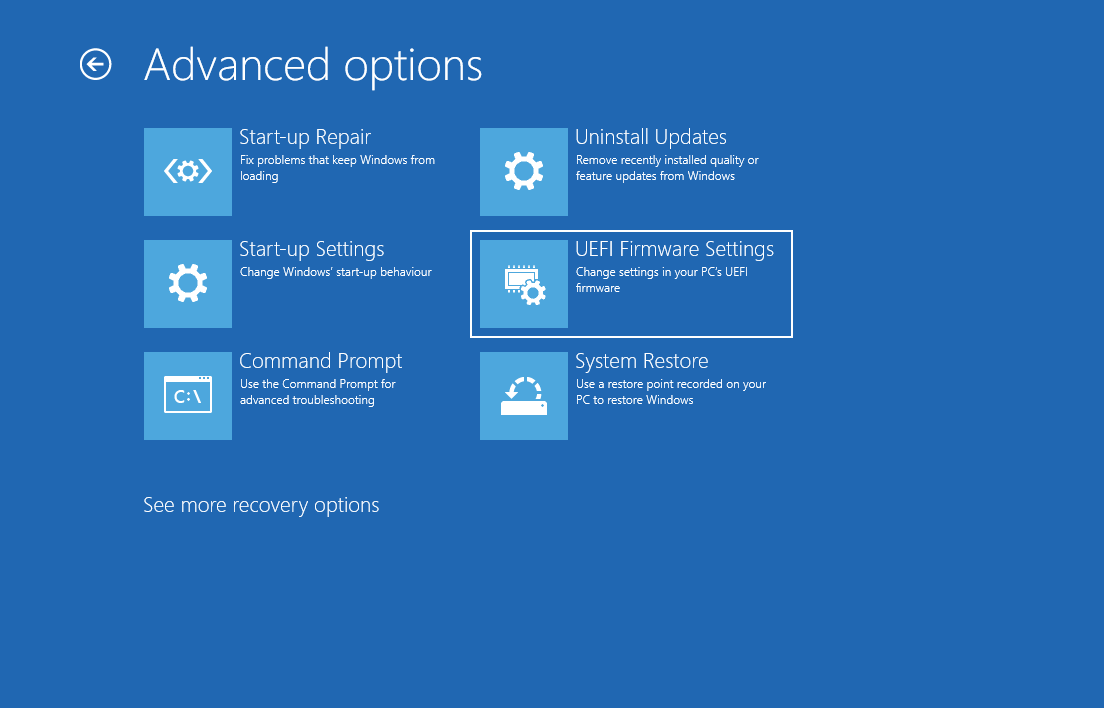
Windows 8 and newer: a visual walk-through
- Open the start-up menu and write "start-up", then select Change advanced start-up options
- Under the Advanced start-up section, click on Restart now
- Select Troubleshoot
- Then select Advanced options
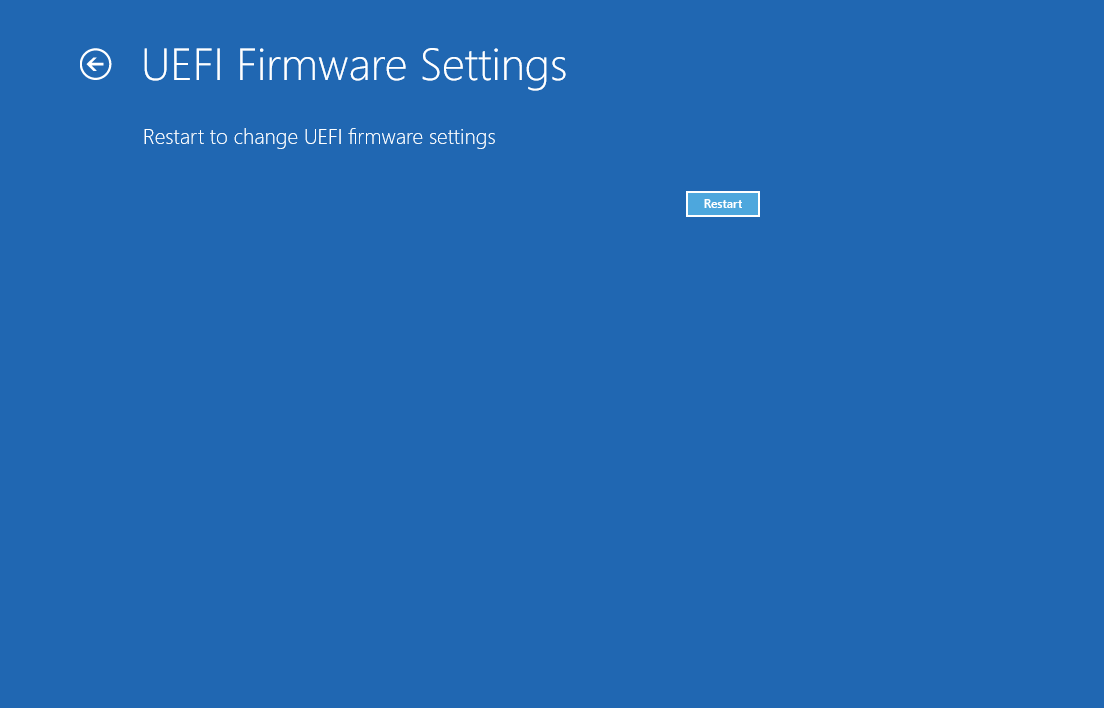
- Select UEFI Firmware Settings
- Hit Restart
- Go to the section Modify the firmware configuration to learn what to do next.
MacOS-based computers
Hardware-assisted virtualization is a hit or miss on Apple computers, as there is no way to access the platform firmware interface on these computers.
Apple users can go to the installation section directly, create a USB stick and hope that hardware-assisted virtualization will be supported.
Other computers
Make sure the targeted computer is shut down.
During the POST phase, you need to press a certain key to access the firmware configuration tool for your motherboard, which is part of your BIOS or UEFI.
Just after pressing the power button, hit the right key to access the firmware configuration tool, usually F2 or Del, but it may be another keystroke on your model.
Do not hesitate to repeatedly press the pertinent key as soon has your computer has started, to make sure it is registered {.is-info}
Modify the firmware configuration
Unfortunately, most firmware configuration tool do differ, and the steps here might not be identical on your current platform. In general, the sought after features are found under the Security tab.
For an AMD-based computer, you need to look for references to AMD SVM, AMD V or AMD Vi. For an Intel-based computer, you need to look for Intel VT-x and Intel VT-d.
It is also possible that the feature will be referred simply to as Virtualization. In that case, you may not know if it actually refers to IOMMU-based or non-IOMMU-based hardware-assisted virtualization.
Make sure you enable these options and choose to save and exit, which will reboot your computer.
A visual walk-through for Intel-based NUC
Here is a visual walk-through for an Intel NUC computer.
- After you have pressed the F2 key on boot, this screen should appear.
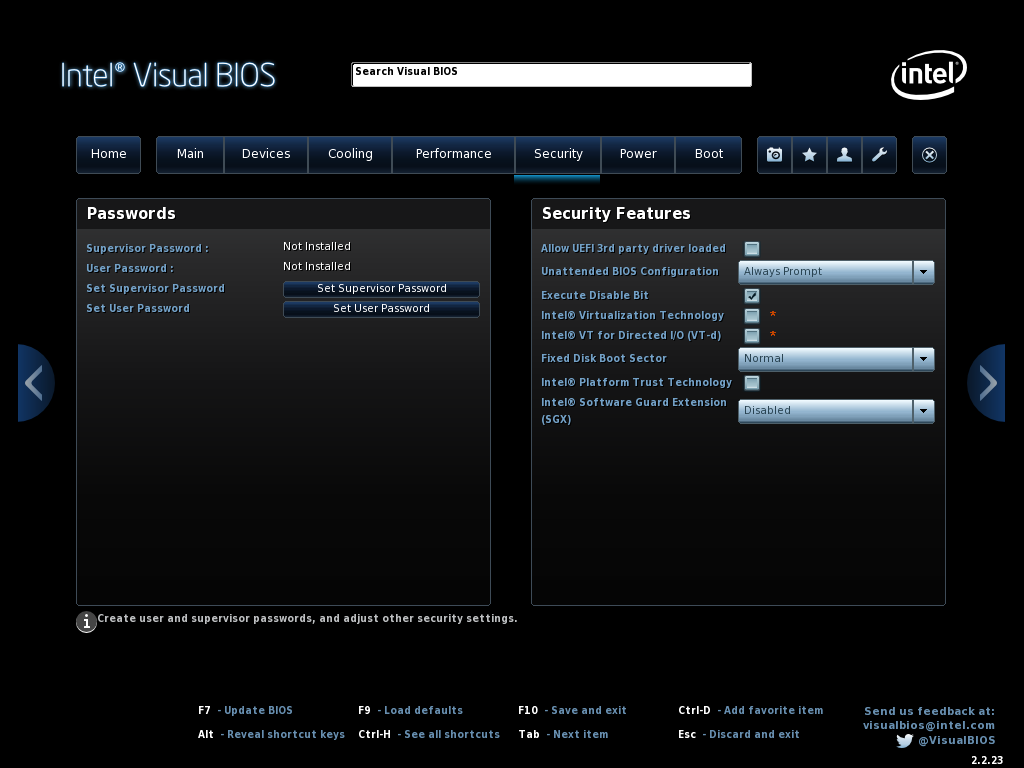
- Go to the Security tab. Under the Security Features menu, you will find two options, Intel Virtualization Technology and Intel VT for Directed I/O (VT-d).
- Check these boxes
Then save and exit the configuration tool, which will reboot your computer.
While you are there, you could also change the boot order, to make sure that your computer will boot from an attached USB thumb drive first when it will be time to try out Phyllome OS. {.is-info}
Modify the boot order permanently
This section will show you how to modify the boot order permanently, so you can boot from a USB flash drive attached to your computer, a necessary step to install or use Phyllome OS as a live system.
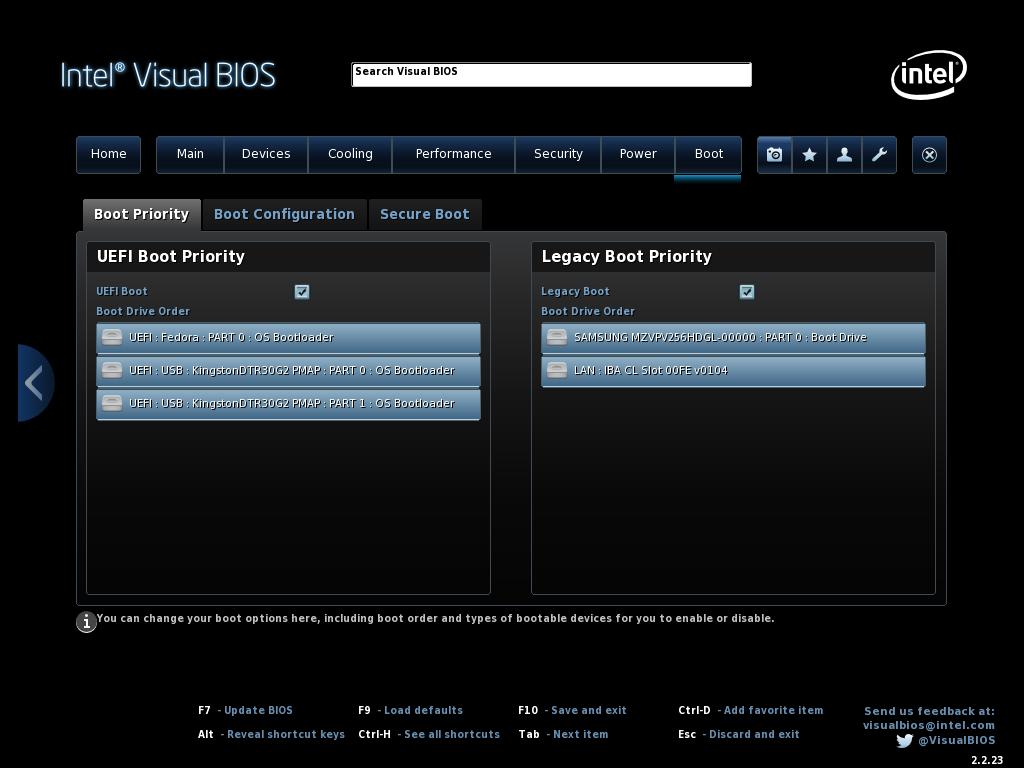
- Go to the Boot tab
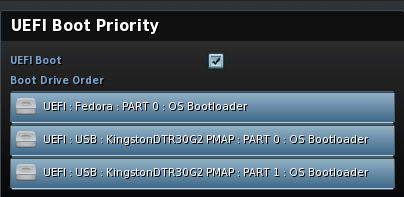
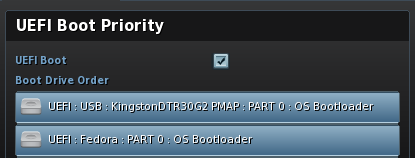
- Under the UEFI Boot Priority menu, you may notice that Fedora, which is installed on the internal storage device, is in the first position
- Move the USB Flash Drive to the first position instead, as shown in the screenshot below
- That's it. Save changes and exist. Note that it is advisable to revert these changes after a successful installation, or to only change the bootloader temporary.
If the activation is successful, you can go to the next section to prepare an installation medium.
