5.0 KiB
| title | description | published | date | tags | editor | dateCreated |
|---|---|---|---|---|---|---|
| Install Phyllome OS | true | 2021-11-22T21:21:46.374Z | markdown | 2021-11-14T16:19:00.348Z |
How to install Phyllome OS
As of now, it is only possible to deploy Phyllome OS using an offical Fedora ISO file. It you don't have a USB flash drive ready to use, please go back to the last section. {.is-info}
This page is intended for users that would like to install Phyllome OS permanently on their computer. Installing Phyllome OS means booting from a bootable USB flash drive and fetching an online kickstart file. A kickstart file contains instructions to automatically deploy an operating system. This is a destructive process so please be cautious.
If you wish to learn more about how kickstart files are used to create Phyllome OS, please have a look at the official git repository.
Boot from a USB flash drive
- General requirements
- A wired Internet connection is required. A file will be fetched online during the installation process.
- A storage device. The kickstart file will look for a storage device and install Phyllome OS. If there is no disk available, the installation will fail.
The following section illustrates how to change the boot order temporarily. The process to change the boot order depends on your current computer platform. Please follow the instruction that matches your platform.
macOS
- Make sure that your computer is turned-off.
- Plug the USB flash drive loaded with the official Fedora ISO.
- Locate the Alt / Option key on your keyboard.
- Turn your computer on and immediately press the Alt / Option key continuously.
- The startup manager should appear after a few seconds.
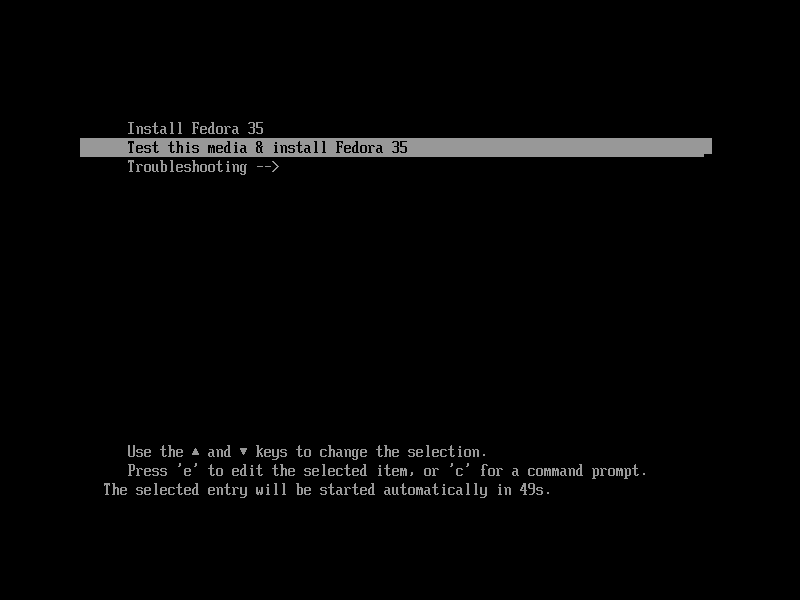
- Click on the option called EFI and the GRUB splash screen will appear. Go to the section below to learn what to do next.
Windows 8 and later versions
Section under construction {.is-warning}
Other computers
Section under construction {.is-warning}
Alter the GRUB instructions
GRUB is universal bootloader that ship with many Linux distributions. It is a software made to find and load operating systems during a boot process. {.is-info}
One needs to alter the GRUB instructions before the USB flash drive can load the Anaconda Installer, which is normally used to install Fedora and other related distributions. If Fedora is already installed on your computer, and if your GRUB is not password protected, which is the default behavior, you may also be able to follow the instructions below.
EFI-based firmware
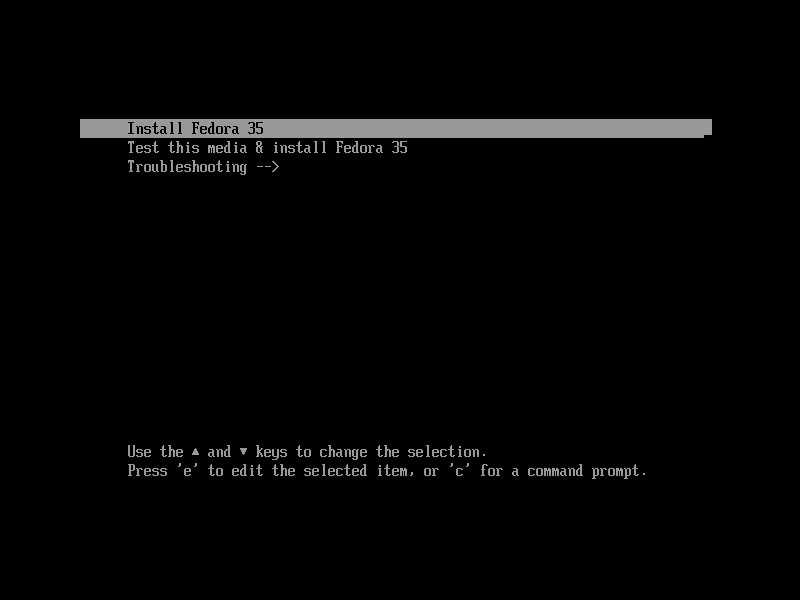
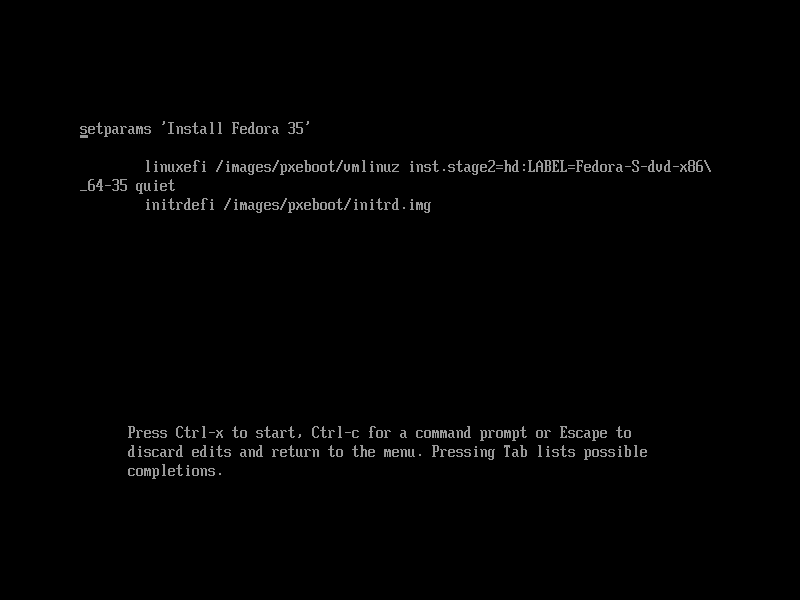
- On the GRUB splash screen, navigate to the first entry using your keyboard arrow key and press e.
- On the new screen, navigate after the quiet word.
GRUB defaults to the US keyboard layout. Have a look at this online ressource to find the corresponding keys if you are having a hard time finding the right keystroke {.is-info}
Danger Zone: the next instruction will trigger an automated process that will destroy any data located on the internal disk present in your computer. {.is-danger}
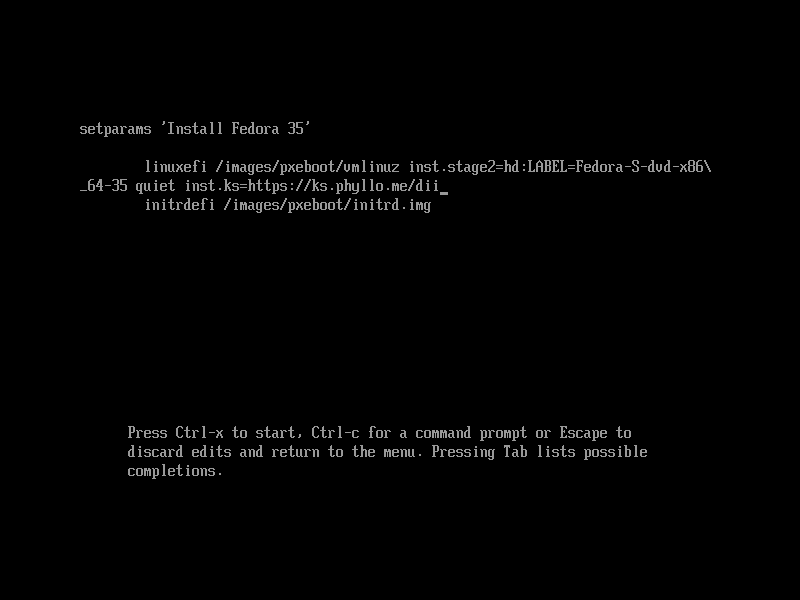
- Leave a blank space after the
quietword and write exactly the followinginst.ks=https://ks.phyllo.me/dii, then press Ctrl + x simultaneously. This command will trigger the automated installation of Phyllome OS.
The shortened URL
https://ks.phyllo.me/diipoints to the latest Desktop version of Phyllome OS, tweaked for Intel CPUs and GPUs. The kickstart file is available here: https://raw.githubusercontent.com/PhyllomeOS/phyllomeos/main/leaves/flat-dhi.cfg. Any valid kickstart file may be used. {.is-info}
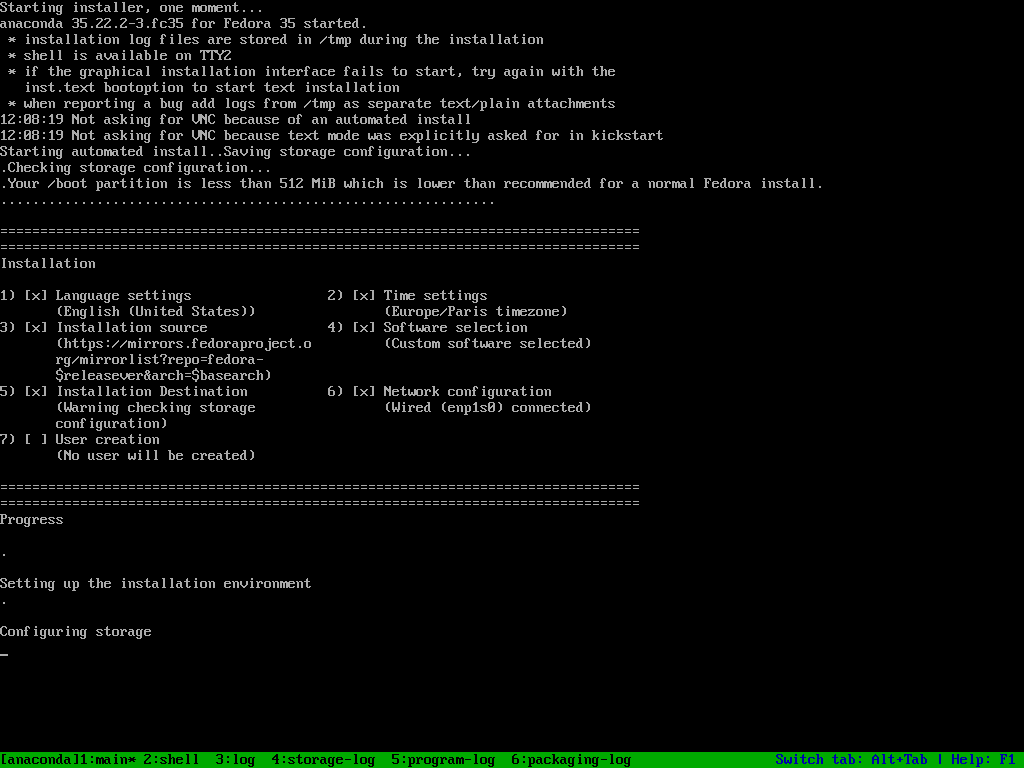
- During the installation process, you can use Alt + Tab to cycle through tabs, and look at the logs in real-time
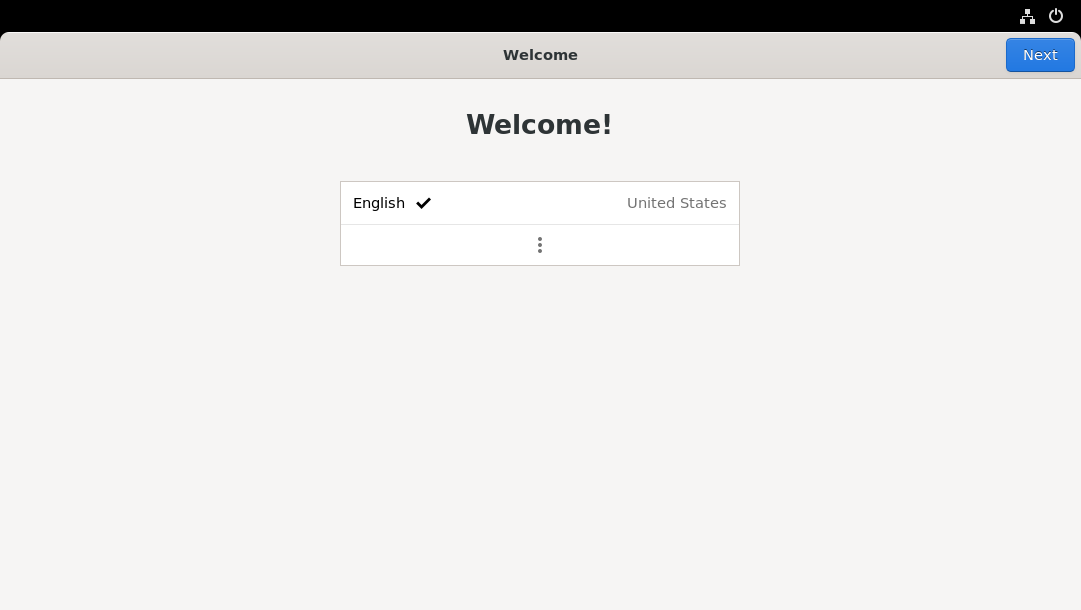
- After a few minutes, you should be greeted with a welcome screen.
- Go to the First-launch configuration section to learn what to do next.
BIOS-based firmware
Section under construction {.is-warning}
First-launch
Section under construction {.is-warning}
Please go to the Get Started section to learn what to do next.
